Esp8266-workshop
Contents
- 1 About
- 2 Arduino IDE
- 3 Wemos D1 mini
- 4 Participants
- 5 Links
- 6 Notes
- 6.1 ESP8266 HSBXL 31MAY2016
- 6.1.1 Install Arduino IDE, I run v1.6.7
- 6.1.2 Serial drivers
- 6.1.3 Follow this procedure to install the ESP8266 addon
- 6.1.4 Select "Wemos D1 R2 & MINI"
- 6.1.5 Blink the onboard blue LED (no soldering required)
- 6.1.6 Esp-link demo:
- 6.1.7 Wifi webserver:
- 6.1.8 Power consumption: https://nurdspace.nl/ESP8266
- 6.1.9 Socat
- 6.1.10 Deepsleep
- 6.1.11 esp-link https://github.com/jeelabs/esp-link/releases
- 6.1.12 Nodemcu
- 6.1.13 Micropython
- 6.1.14 pushbutton sensing & sleep
- 6.1 ESP8266 HSBXL 31MAY2016
About
ESP8266 workshop, learn your way to add wifi to your devices.
Arduino IDE
You can use the Arduino IDE to upload code to the device
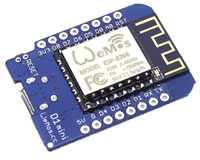
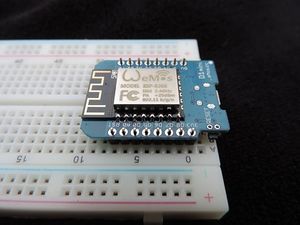
Wemos D1 mini
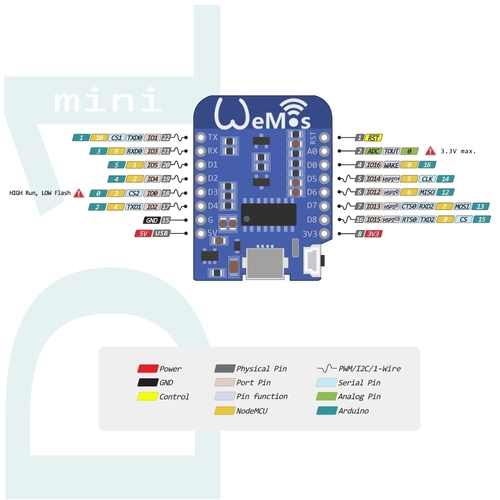
Pinout
Participants
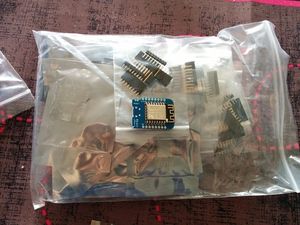
- zoobab (40x wemos-d1-mini, 3x witicloud, xx ESP-01)
- ptr_here (1 esp8266 thingie + group-order)
- friedger (group order)
- betz (group order)
Links
- http://www.cnx-software.com/2016/02/19/4-wemos-d1-mini-esp8266-board-supports-shields-with-a-temperature-sensor-a-button-a-relay-or-a-micro-sd-slot/
- https://nurdspace.nl/ESP8266
Notes
( during workshop : http://piratepad.be/p/esp8266-workshop -- please add to this wiki instead)
ESP8266 HSBXL 31MAY2016
Install Arduino IDE, I run v1.6.7
1.6.9 also tested
Serial drivers
linux
linux ch340g should create /dev/ttyUSB0, check "dmesg"
lsusb:
Bus 001 Device 005: ID 1a86:7523 QinHeng Electronics HL-340 USB-Serial adapter
dmesg:
dmesg: [ 5605.989191] ch341 1-1.1:1.0: ch341-uart converter detected
dmesg: [ 5605.990896] usb 1-1.1: ch341-uart converter now attached to ttyUSB0
osx
You need some "signed" drivers for ch340g (worked for us on macosx 10.10.5) http://blog.sengotta.net/signed-mac-os-driver-for-winchiphead-ch340-serial-bridge/
windoze
http://www.arduined.eu/tag/windows-7/
Follow this procedure to install the ESP8266 addon
(xcompilers etc): https://learn.sparkfun.com/tutorials/esp8266-thing-hookup-guide/installing-the-esp8266-arduino-addon
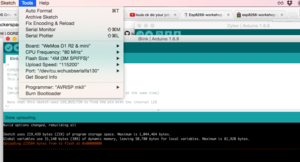
Select "Wemos D1 R2 & MINI"
We have a "wemos d1 mini" here for the workshop / easy selectable from 'boards' menu in arduino IDE
(we set baudrate to 115200 as default proposed value didn't work out on macosx)
Blink the onboard blue LED (no soldering required)
http://www.cnx-software.com/2016/03/22/getting-started-with-wemos-d1-mini-esp8266-board-dht-relay-shields/
/*
* Blink
* Turns on the onboard LED on for one second, then off for one second, repeatedly.
* This uses delay() to pause between LED toggles.
*/

void setup() {
  pinMode(BUILTIN_LED, OUTPUT);  // initialize onboard LED as output
}

void loop() {
  digitalWrite(BUILTIN_LED, HIGH);  // turn on LED with voltage HIGH
  delay(1000);                      // wait one second
  digitalWrite(BUILTIN_LED, LOW);   // turn off LED with voltage LOW
  delay(1000);                      // wait one second
}
Esp-link demo:
esplink is a firmware that provides web-based - easy config of wifi (client/AP) -monitor serial port - tcp to SLIP
http://www.zoobab.com/esp8266-serial2wifi-bridge
Wifi webserver:
minimal example of running a webserver & provide web interface to digital I/O
http://www.arduinesp.com/wifiwebserverneed to replace some accolades on line 65 to get it to compile... (unicode > text fck-up) -- exact characters to replace seems to depend on platform ?!? check
' "characters...
Power consumption: https://nurdspace.nl/ESP8266
Phant Git: https://github.com/sparkfun/phant-arduino/blob/master/src/
Socat
examples: http://technostuff.blogspot.be/2008/10/some-useful-socat-commands.html
Go to: File -> Examples -> ESP8266Wif -> WifiClientBasic
You can run a server to capture the content like this, change the IP and PORT of your laptop:
socat -u TCP4-LISTEN:3334,reuseaddr,fork OPEN:/tmp/file.log,creat,append
You should get:
zoobab@sabayonx86-64 /home/zoobab/Downloads/arduino-1.6.7 [1]# tail -f /tmp/file.log
Send this data to server
Send this data to server
Send this data to server
Send this data to server
Deepsleep
https://github.com/esp8266/Arduino/issues/1488 "With ESP.deepSleep(0), esp will be going to sleep forever."
https://github.com/chaeplin/esp8266_and_arduino/tree/master/_48-door-alarm-deepsleep
// connect PIN D0 to RST

#include <ESP8266WiFi.h>

// Time to sleep (in seconds):
const int sleepTimeS = 1;

void setup()
{
 Serial.begin(115200);
  // seconds by 1e6
  Serial.print("test\n"); // Trying to avoid using serial
 ESP.deepSleep(sleepTimeS * 1000000);
}

void loop()
{
}
there's an elaborate example on sparkfun, which sends data every 30minutes to phantom server (some data IoT platform junk @sparkfun)
https://learn.sparkfun.com/tutorials/esp8266-thing-hookup-guide/example-sketch-goodnight-thing-sleep-mode
esp-link https://github.com/jeelabs/esp-link/releases
Flashing script:
curl -L https://github.com/jeelabs/esp-link/releases/download/v2.2.beta2/esp-link-v2.2.beta2.tgz | tar xzf -
cd esp-link-v2.2.beta2
esptool.py --port /dev/ttyUSB0 --baud 460800 write_flash -fs 32m -ff 80m 0x00000 boot_v1.5.bin 0x1000 user1.bin 0x3FE000 blank.bin
http://172.23.187.94/home.html
mosquitto_sub -h test.mosquitto.org -t "#" -v
Nodemcu
http://nodemcu.com/index_en.html#fr_5475f7667976d8501100000f
Micropython
http://www.electrodragon.com/w/MicroPython_ESP8266 No binary release to flash
pushbutton sensing & sleep
void setup() {
  pinMode(D3, OUTPUT);
  pinMode(D1, INPUT);
  pinMode(D2, INPUT);

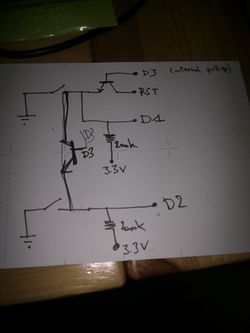
  digitalWrite(D3, LOW);  // D3 is pullup, put it low to disable RST circuitry

  // D1 & D2 are pullup, so active when LOW

  Serial.begin(115200);

  for(int i =0; i<100;i++){
    int s1 = digitalRead(D1);
    int s2 = digitalRead(D2);
    Serial.print("(");
    Serial.print(s1);
    Serial.print(",");
    Serial.print(s2);
    Serial.print(") ");
    delay(100);
    if(i%10==0) Serial.println("");
  }
  ESP.deepSleep(0);
}

void loop() {
  // put your main code here, to run repeatedly:
}
