This is an old old old archive. Please don't trust any information you find on this wiki. Looking for up-to-date information? Go to hsbxl.be or join our Matrix channel.
Esp8266-workshop
Contents
- 1 About
- 2 Arduino IDE
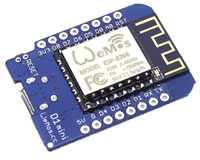
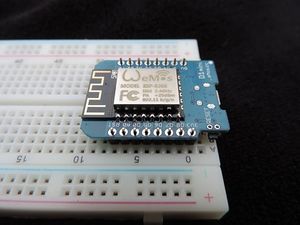
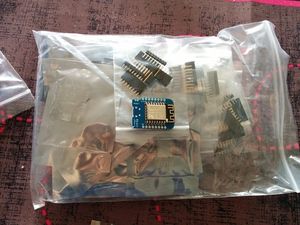
- 3 Wemos D1 mini
- 4 Participants
- 5 Links
- 6 Notes
- 6.1 ESP8266 HSBXL 31MAY2016
- 6.1.1 Install Arduino IDE, I run v1.6.7
- 6.1.2 Serial drivers
- 6.1.3 Follow this procedure to install the ESP8266 addon
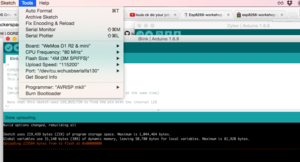
- 6.1.4 Select "Wemos D1 R2 & MINI"
- 6.1.5 Blink the onboard blue LED (no soldering required)
- 6.1.6 Esp-link demo:
- 6.1.7 Wifi webserver:
- 6.1.8 Power consumption: https://nurdspace.nl/ESP8266
- 6.1.9 Socat
- 6.1.10 Deepsleep
- 6.1.11 esp-link https://github.com/jeelabs/esp-link/releases
- 6.1.12 Nodemcu
- 6.1.13 Micropython
- 6.1.14 pushbutton sensing & sleep
- 6.1 ESP8266 HSBXL 31MAY2016
About[edit]
ESP8266 workshop, learn your way to add wifi to your devices.
Arduino IDE[edit]
You can use the Arduino IDE to upload code to the device
Wemos D1 mini[edit]
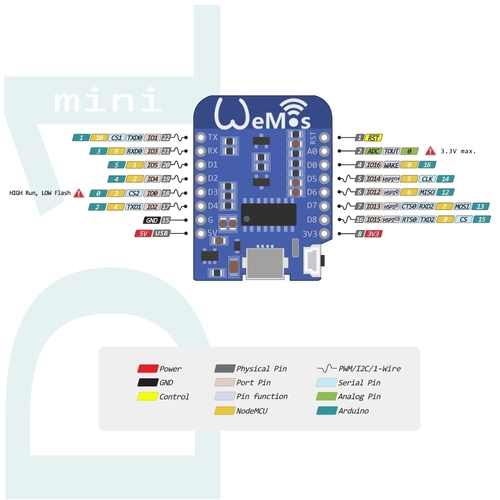
Pinout[edit]
Participants[edit]
- zoobab (40x wemos-d1-mini, 3x witicloud, xx ESP-01)
- ptr_here (1 esp8266 thingie + group-order)
- friedger (group order)
- betz (group order)
Links[edit]
- http://www.cnx-software.com/2016/02/19/4-wemos-d1-mini-esp8266-board-supports-shields-with-a-temperature-sensor-a-button-a-relay-or-a-micro-sd-slot/
- https://nurdspace.nl/ESP8266
Notes[edit]
( during workshop : http://piratepad.be/p/esp8266-workshop -- please add to this wiki instead)
ESP8266 HSBXL 31MAY2016[edit]
Install Arduino IDE, I run v1.6.7[edit]
1.6.9 also tested
Serial drivers[edit]
linux[edit]
linux ch340g should create /dev/ttyUSB0, check "dmesg"
lsusb:
Bus 001 Device 005: ID 1a86:7523 QinHeng Electronics HL-340 USB-Serial adapter
dmesg:
dmesg: [ 5605.989191] ch341 1-1.1:1.0: ch341-uart converter detected
dmesg: [ 5605.990896] usb 1-1.1: ch341-uart converter now attached to ttyUSB0
osx[edit]
You need some "signed" drivers for ch340g (worked for us on macosx 10.10.5) http://blog.sengotta.net/signed-mac-os-driver-for-winchiphead-ch340-serial-bridge/
windoze[edit]
http://www.arduined.eu/tag/windows-7/
Follow this procedure to install the ESP8266 addon[edit]
(xcompilers etc): https://learn.sparkfun.com/tutorials/esp8266-thing-hookup-guide/installing-the-esp8266-arduino-addon
Select "Wemos D1 R2 & MINI"[edit]
We have a "wemos d1 mini" here for the workshop / easy selectable from 'boards' menu in arduino IDE
(we set baudrate to 115200 as default proposed value didn't work out on macosx)
Blink the onboard blue LED (no soldering required)[edit]
http://www.cnx-software.com/2016/03/22/getting-started-with-wemos-d1-mini-esp8266-board-dht-relay-shields/
/*
* Blink
* Turns on the onboard LED on for one second, then off for one second, repeatedly.
* This uses delay() to pause between LED toggles.
*/

void setup() {
  pinMode(BUILTIN_LED, OUTPUT);  // initialize onboard LED as output
}

void loop() {
  digitalWrite(BUILTIN_LED, HIGH);  // turn on LED with voltage HIGH
  delay(1000);                      // wait one second
  digitalWrite(BUILTIN_LED, LOW);   // turn off LED with voltage LOW
  delay(1000);                      // wait one second
}
Esp-link demo:[edit]
esplink is a firmware that provides web-based - easy config of wifi (client/AP) -monitor serial port - tcp to SLIP
http://www.zoobab.com/esp8266-serial2wifi-bridge
Wifi webserver:[edit]
minimal example of running a webserver & provide web interface to digital I/O
http://www.arduinesp.com/wifiwebserverneed to replace some accolades on line 65 to get it to compile... (unicode > text fck-up) -- exact characters to replace seems to depend on platform ?!? check
' "characters...
Power consumption: https://nurdspace.nl/ESP8266[edit]
Phant Git: https://github.com/sparkfun/phant-arduino/blob/master/src/
Socat[edit]
examples: http://technostuff.blogspot.be/2008/10/some-useful-socat-commands.html
Go to: File -> Examples -> ESP8266Wif -> WifiClientBasic
You can run a server to capture the content like this, change the IP and PORT of your laptop:
socat -u TCP4-LISTEN:3334,reuseaddr,fork OPEN:/tmp/file.log,creat,append
You should get:
zoobab@sabayonx86-64 /home/zoobab/Downloads/arduino-1.6.7 [1]# tail -f /tmp/file.log
Send this data to server
Send this data to server
Send this data to server
Send this data to server
Deepsleep[edit]
https://github.com/esp8266/Arduino/issues/1488 "With ESP.deepSleep(0), esp will be going to sleep forever."
https://github.com/chaeplin/esp8266_and_arduino/tree/master/_48-door-alarm-deepsleep
// connect PIN D0 to RST

#include <ESP8266WiFi.h>

// Time to sleep (in seconds):
const int sleepTimeS = 1;

void setup()
{
 Serial.begin(115200);
  // seconds by 1e6
  Serial.print("test\n"); // Trying to avoid using serial
 ESP.deepSleep(sleepTimeS * 1000000);
}

void loop()
{
}
there's an elaborate example on sparkfun, which sends data every 30minutes to phantom server (some data IoT platform junk @sparkfun)
https://learn.sparkfun.com/tutorials/esp8266-thing-hookup-guide/example-sketch-goodnight-thing-sleep-mode
esp-link https://github.com/jeelabs/esp-link/releases[edit]
Flashing script:
curl -L https://github.com/jeelabs/esp-link/releases/download/v2.2.beta2/esp-link-v2.2.beta2.tgz | tar xzf -
cd esp-link-v2.2.beta2
esptool.py --port /dev/ttyUSB0 --baud 460800 write_flash -fs 32m -ff 80m 0x00000 boot_v1.5.bin 0x1000 user1.bin 0x3FE000 blank.bin
http://172.23.187.94/home.html
mosquitto_sub -h test.mosquitto.org -t "#" -v
Nodemcu[edit]
http://nodemcu.com/index_en.html#fr_5475f7667976d8501100000f
Micropython[edit]
http://www.electrodragon.com/w/MicroPython_ESP8266 No binary release to flash
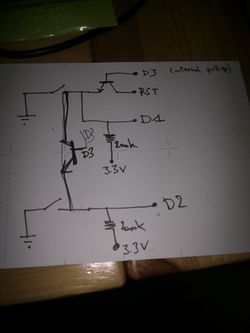
pushbutton sensing & sleep[edit]
void setup() {
  pinMode(D3, OUTPUT);
  pinMode(D1, INPUT);
  pinMode(D2, INPUT);

  digitalWrite(D3, LOW);  // D3 is pullup, put it low to disable RST circuitry

  // D1 & D2 are pullup, so active when LOW

  Serial.begin(115200);

  for(int i =0; i<100;i++){
    int s1 = digitalRead(D1);
    int s2 = digitalRead(D2);
    Serial.print("(");
    Serial.print(s1);
    Serial.print(",");
    Serial.print(s2);
    Serial.print(") ");
    delay(100);
    if(i%10==0) Serial.println("");
  }
  ESP.deepSleep(0);
}

void loop() {
  // put your main code here, to run repeatedly:
}
